How to Build Interactive Forms Using HTML and CSS
In modern web applications, forms are a very important portal that enables communication between users and website owners. Making the forms interactive is a crucial task for web developers, as these forms have the potential to attract more customers and increase lead conversions. In this article, we discuss how to create interactive forms using HTML and CSS.
Prerequisites
Before proceeding with this article, make sure you understand the basics of HTML and CSS, such as building the grid layout, creating transitions, animations, and so on.
What are the HTML form elements
Let's begin with a brief review of the HTML form elements.
The <form> element
First of all, there is a <form> element that acts as the container for the entire form.
<form action="some_program.php" method="POST">. . .</form>The element accepts two attributes, action and method. action points to the program that will be processing the form data after it has been submitted. And method defines the corresponding HTTP method that will be used to transmit the form data.
The input fields
Inside the <form> element, there should be input fields and their associated labels.
<form action="some_program.php" method="POST">
  <label for="username">Name:</label>
  <input type="text" id="username" name="username" />
</form>
Note that the for attribute of <label> matches the id of the <input> element.

When designing your form, you should remember that it might be used by different audiences, so it is very important that you do not forget to add labels for the input fields to ensure accessibility.
The <input> element comes in many different types, and you can specify it using the type attribute.
<form action="some_program.php" method="POST">
  <label for="username">Name:</label>
  <input type="text" id="username" name="username" />

  <input type="button" />
  <input type="checkbox" />
  <input type="color" />
  <input type="date" />
  <input type="datetime-local" />
  <input type="email" />
  <input type="file" />
  <input type="hidden" />
  <input type="image" />
  <input type="month" />
  <input type="number" />
  <input type="password" />
  <input type="radio" />
  <input type="range" />
  <input type="reset" />
  <input type="search" />
  <input type="submit" />
  <input type="tel" />
  <input type="text" />
  <input type="time" />
  <input type="url" />
  <input type="week" />
</form>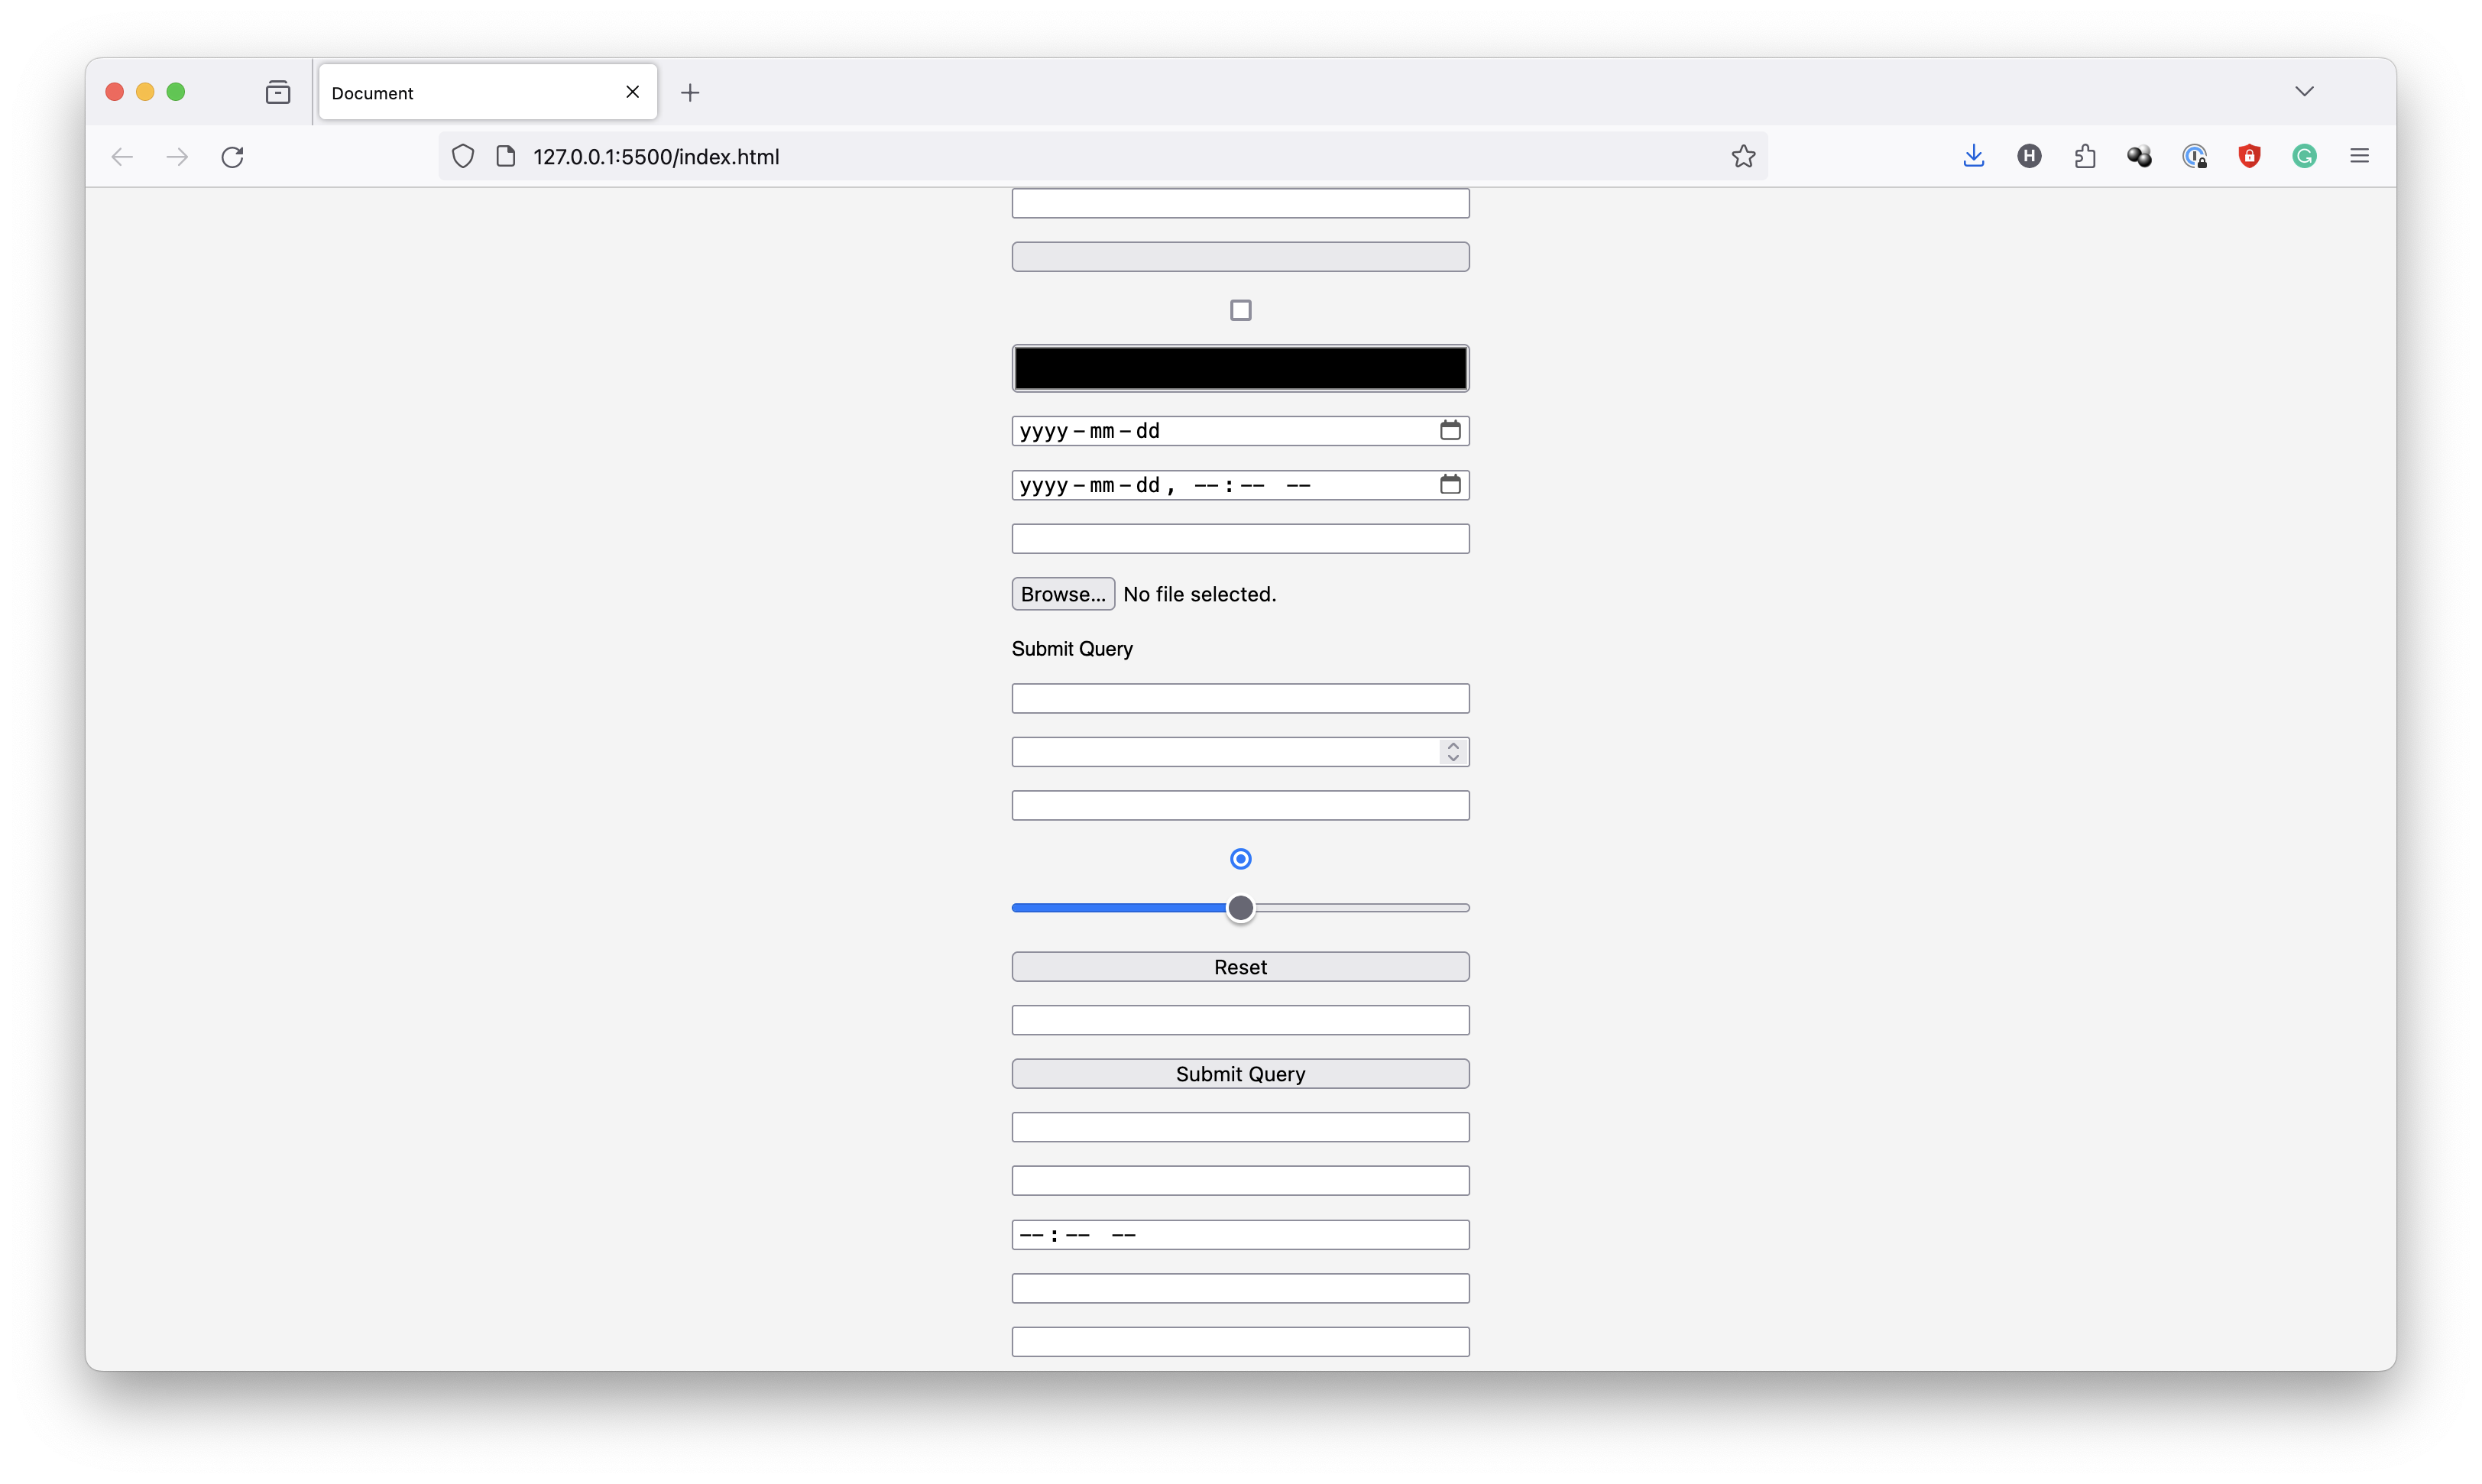
Besides the <input>, there is also <textarea>, which allows you to define a multi-line input field.
<textarea name="message" rows="10" cols="30">
  Lorem ipsum . . .
</textarea>
The rows and cols attributes are used to define the initial size of the <textarea> element when it is first loaded.
And lastly, there is a <select> field that allows the user to select one or more options from a list.
<label for="programming-languages">Choose a programming language:</label>
<select id="programming-languages" name="programming-languages">
  <option value="javascript">JavaScript</option>
  <option value="python">Python</option>
  <option value="java">Java</option>
  <option value="csharp">C#</option>
</select>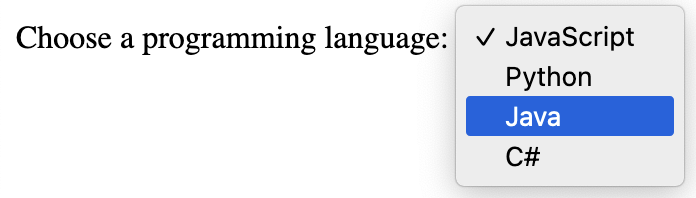
The <option> element defines the options for the select field. When the form is submitted, the corresponding value will be passed to the backend to be processed.
Building your first form
For this tutorial, let's build a signup form. We'll start with the HTML structure.
<form action="/some_program.php" method="POST">
  <label for="username">Username:</label>
  <input type="text" name="username" id="username" />

  <label for="email">Email:</label>
  <input type="email" name="email" id="email" />

  <label for="password">Password:</label>
  <input type="password" name="password" id="password" />

  <input type="submit" value="Submit" />
</form>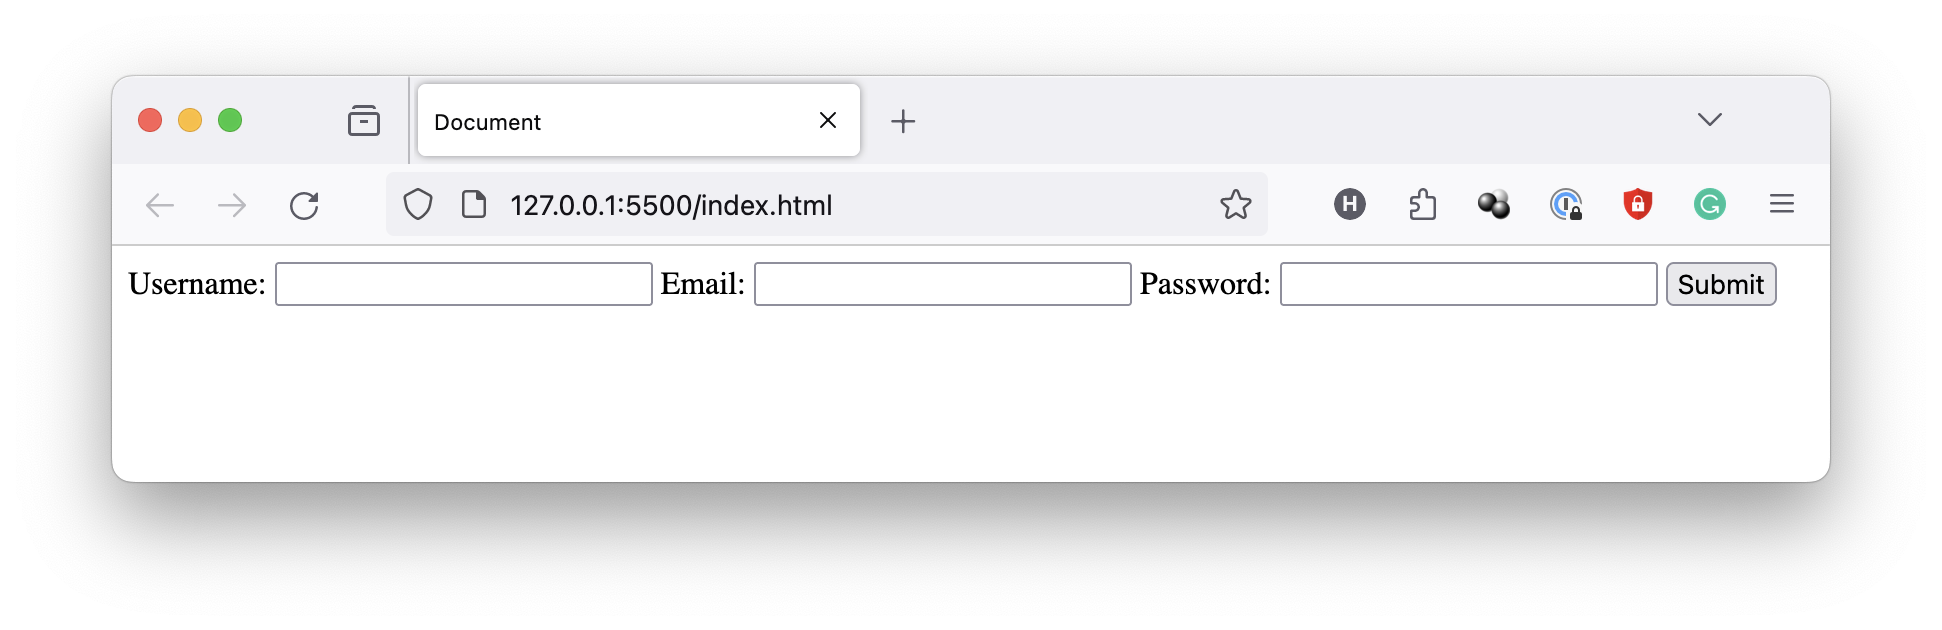
This form contains a username field, an email field, a password field, as well as a submit button.
Aside from the submit field, which is a special case, each <input> field has a corresponding <label>, which describes the purpose of that field. The for attribute of <label> matches the id of the <input> field.
When the submit button is clicked, the browser will gather all the user inputs and create a key/value data structure. With the name attribute of each field being the key, and the corresponding user inputs being the value. Then, the data will be transmitted to the some_program.php program to be processed using a POST method.
How to style the form using CSS
As you can see, this form is only a skeleton. So next, let's make the form look better by adding some CSS. We'll start by removing all the default paddings and margins and also set box-sizing to border-box, making resizing the elements easier.
* {
  box-sizing: border-box;
  padding: 0px;
  margin: 0px;
}
And then, make sure the form is centered both horizontally and vertically. You may skip this step if you don't need it to be centered.
body {
  font-family: Arial, Helvetica, sans-serif;
  background-color: #f4f4f4;
  height: 100vh;

  /* Center the entire form */
  display: flex;
  justify-content: center; /* Horizontally */
  align-items: center; /* Vertically */
}
Line 7 to 9 is a commonly used method to center elements using CSS. Of course, you can go with any other methods explained in the linked article.
Using a flexbox layout
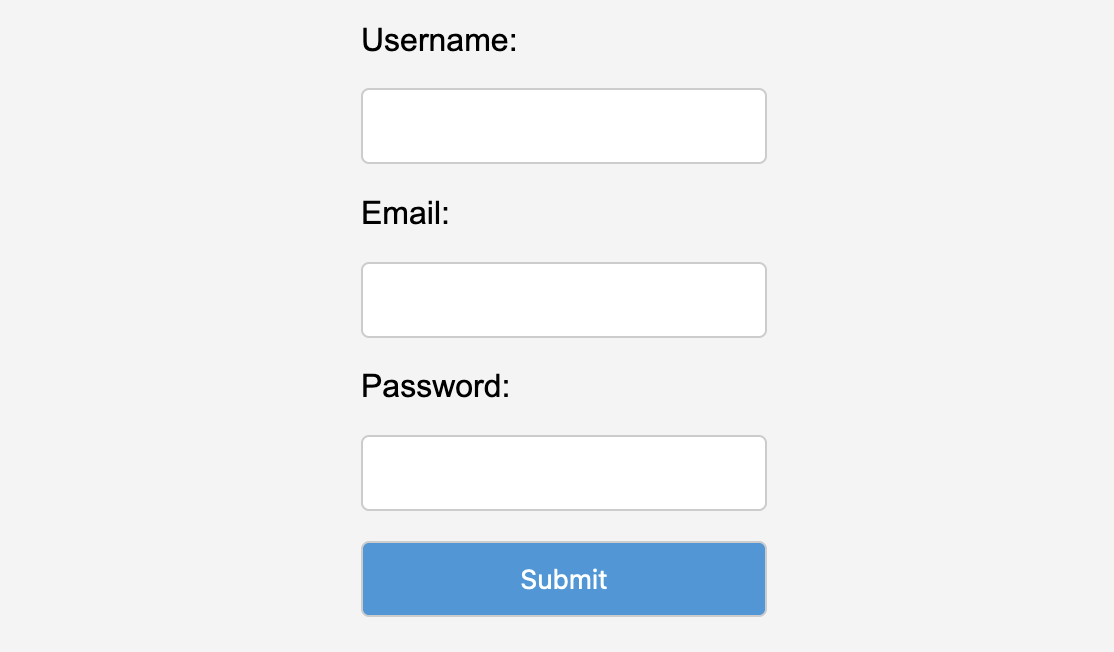
Since this form is fairly basic, you could use a flexbox layout to create a single-column form like this:
form {
  display: flex;
  flex-direction: column;
}
And, of course, don't forget to style the individual input fields and their labels.
label,
input {
  margin-bottom: 15px;
  width: 400px;
}

input[type="text"],
input[type="email"],
input[type="password"],
input[type="submit"] {
  padding: 10px;
  border: 1px solid #ccc;
  border-radius: 4px;
}

input[type="submit"] {
  background-color: #3498db;
  color: #fff;
  cursor: pointer;
}
Using a grid layout
For more complex forms, we recommend using a grid layout instead.
<form>
  <div class="grid-container">
    <div class="grid-item">
      <label for="first-name">First Name:</label>
      <input type="text" id="first-name" name="first-name" />
    </div>
    <div class="grid-item">
      <label for="last-name">Last Name:</label>
      <input type="text" id="last-name" name="last-name" />
    </div>
    <div class="grid-item">
      <label for="email">Email:</label>
      <input type="email" id="email" name="email" />
    </div>
    <div class="grid-item">. . .</div>
  </div>

  <input type="submit" value="Submit" />
</form>.grid-container {
display: grid;
grid-template-columns: repeat(2, 1fr);
gap: 20px;
}
.grid-item {
margin-bottom: 15px;
}Line 3 creates a two-column grid layout with equal sizes.
How to make the form more interactive
And now, we are at the most important part of this tutorial. Let's make this form more interactive, which means you need to create more feedback for user actions. The first tool you could utilize is the pseudo-selectors.
Using pseudo-selectors
Pseudo-selectors are used to select HTML elements based on their states. For example, :hover selects an element only when the cursor is hovered on top of that element.
<div>Hover over me</div>div {
padding: 10px;
margin: auto;
border: 2px solid darkviolet;
border-radius: 10px;
font-family: "Trebuchet MS", "Lucida Sans Unicode", "Lucida Grande",
"Lucida Sans", Arial, sans-serif;
color: darkviolet;
width: 200px;
}
div:hover {
color: white;
background-color: darkviolet;
width: 400px;
}
You can make the form more interactive by utilizing these pseudo-selectors. For instance:
input[type="submit"]:hover {
  background-color: #2980b9;
}

input:focus {
  outline: solid #3498db;
}
The :hover selector activates when a cursor hovers on top of the elements, and in this case, the submit button will turn into a darker blue when the cursor hovers on top. The :focus selector activates when the input field is in focus, and the element will be given an extra outline. Together, they ensure that proper feedback will be returned whenever the user clicks on an input field.

Form input validation
Validating the user inputs on the client side before the data reaches the server is a very important task when designing your form. It can be done by specifying additional attributes to the corresponding form fields.
When designing your form, you should make sure that when the user types in a wrong input, proper feedback is sent back to the user. Let's take a look at an example.
<input
  type="text"
  name="username"
  id="username"
  minlength="10"
  maxlength="20" />
Here, we added some validation rules for the input field. minlength and maxlength each specify the minimum and maximum length of the input string.
When the user input passes the rules, it will have the :valid state. If not, it will acquire the :invalid state. We can use that to specify different styles for the field under different state.
input:valid {
  border: solid #3498db;
}

input:invalid {
  border: solid red;
  outline: solid red;
}
Using transitions and animations
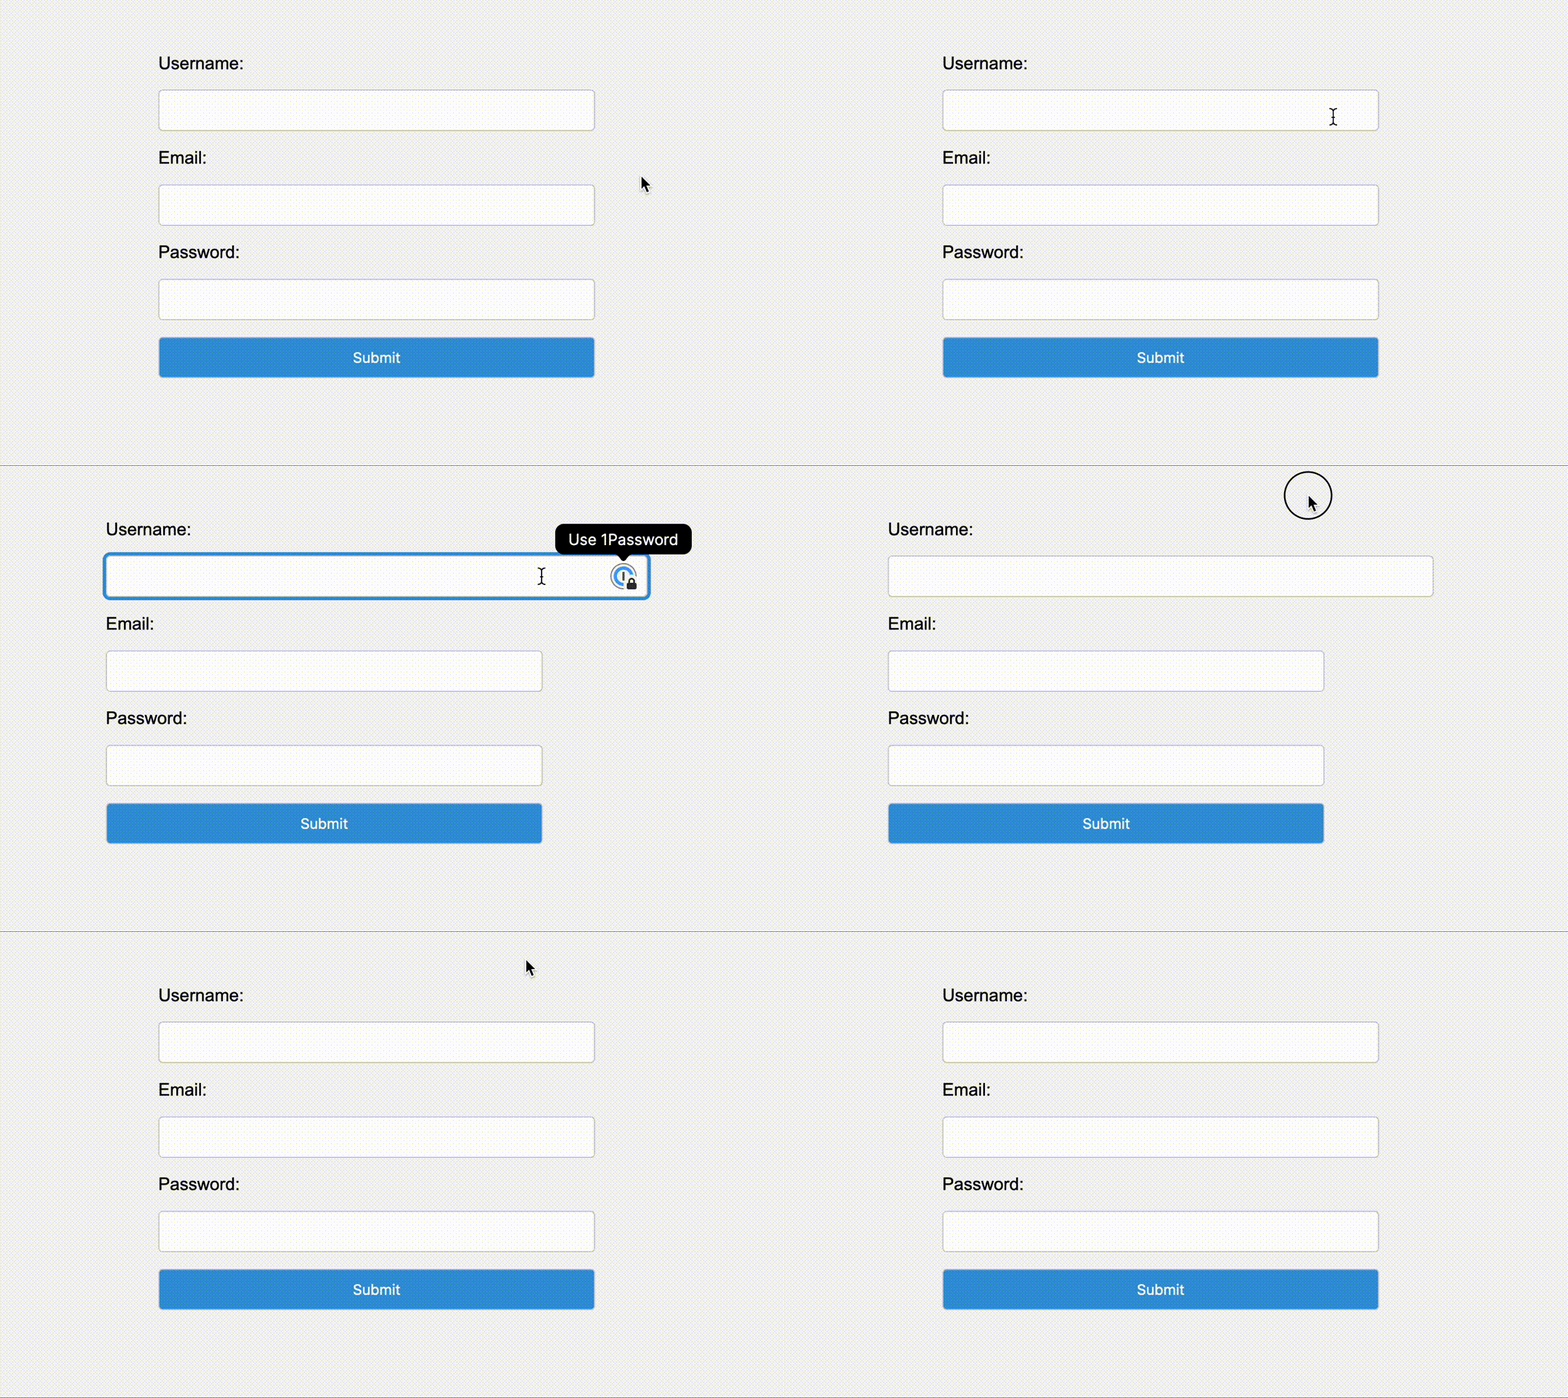
You can even take it one step further and add some transition or animation effects. For example, you can add a transition effect to the input fields, making them grow longer when in focus and smoothly transitioning back to normal when not in focus.
label,
input {
  margin-bottom: 15px;
  width: 400px;

  transition-property: width;
  transition-duration: 1s;
}

input[type="text"]:focus,
input[type="email"]:focus,
input[type="password"]:focus {
  width: 500px;
}
Of course, you can get more creative with this, such as adding a shaking effect combined with color change when the user types something wrong, or a sliding/fading effect when the user submits the form.
Using SVG animations
SVG animation is also something you could add to your form to make it more interactive.
SVG (Scalable Vector Graphics) is an XML-based format used to describe vector images. Unlike regular image formats such as JPEG and PNG, SVGs are smaller, faster, and easier to render. As a result, it is often used to create icons, logos, and illustrations.
For demonstration purposes, let's create a loading spinner that you can add to the form to tell the user that something is being loaded.
<!-- prettier-ignore -->
<svg id="loading-spinner" xmlns="http://www.w3.org/2000/svg" width="48" height="48" viewBox="0 0 48 48"><defs><linearGradient id="spinner-gradient-a" x1="49.892%" x2="55.03%" y1="58.241%" y2="89.889%"><stop offset="0%"/><stop offset="22.44%" stop-opacity=".59"/><stop offset="100%" stop-opacity="0"/></linearGradient></defs><g fill="none" transform="translate(-8 -8)"><path d="M32,56C18.745166,56,8,45.254834,8,32C8,18.745166,18.745166,8,32,8C45.254834,8,56,18.745166,56,32C56,45.254834,45.254834,56,32,56ZM32,52C43.045695,52,52,43.045695,52,32C52,20.954305,43.045695,12,32,12C20.954305,12,12,20.954305,12,32C12,43.045695,20.954305,52,32,52Z"/><path fill="url(#spinner-gradient-a)" d="M56,32C56,33.1045695,55.1045695,34,54,34C52.8954305,34,52,33.1045695,52,32C52,20.954305,43.045695,12,32,12C20.954305,12,12,20.954305,12,32C12,43.045695,20.954305,52,32,52C33.1045695,52,34,52.8954305,34,54C34,55.1045695,33.1045695,56,32,56C18.745166,56,8,45.254834,8,32C8,18.745166,18.745166,8,32,8C45.254834,8,56,18.745166,56,32Z" transform="rotate(45 32 32)"/></g></svg>#loading {
animation: loading-spinner 1s linear infinite;
}
@keyframes loading-spinner {
from {
transform: rotate(0deg);
}
to {
transform: rotate(360deg);
}
}
Conclusion
In this article, we went over some essential techniques to use when designing your form and making it more interactive for the users, including pseudo-selectors, transitions, animations, and SVGs. Together, they create endless possibilities.
- Prerequisites
- What are the HTML form elements
- The `<form>` element
- The input fields
- Building your first form
- How to style the form using CSS
- Using a flexbox layout
- Using a grid layout
- How to make the form more interactive
- Using pseudo-selectors
- Form input validation
- Using transitions and animations
- Using SVG animations
- Conclusion