Payment Collection
Payment processing is one of the most important component of a SaaS platform. By default, our boilerplate integrates with Stripe, and supports both subscription and onetime payment plans.
The boilerplate includes a prebuilt pricing component:
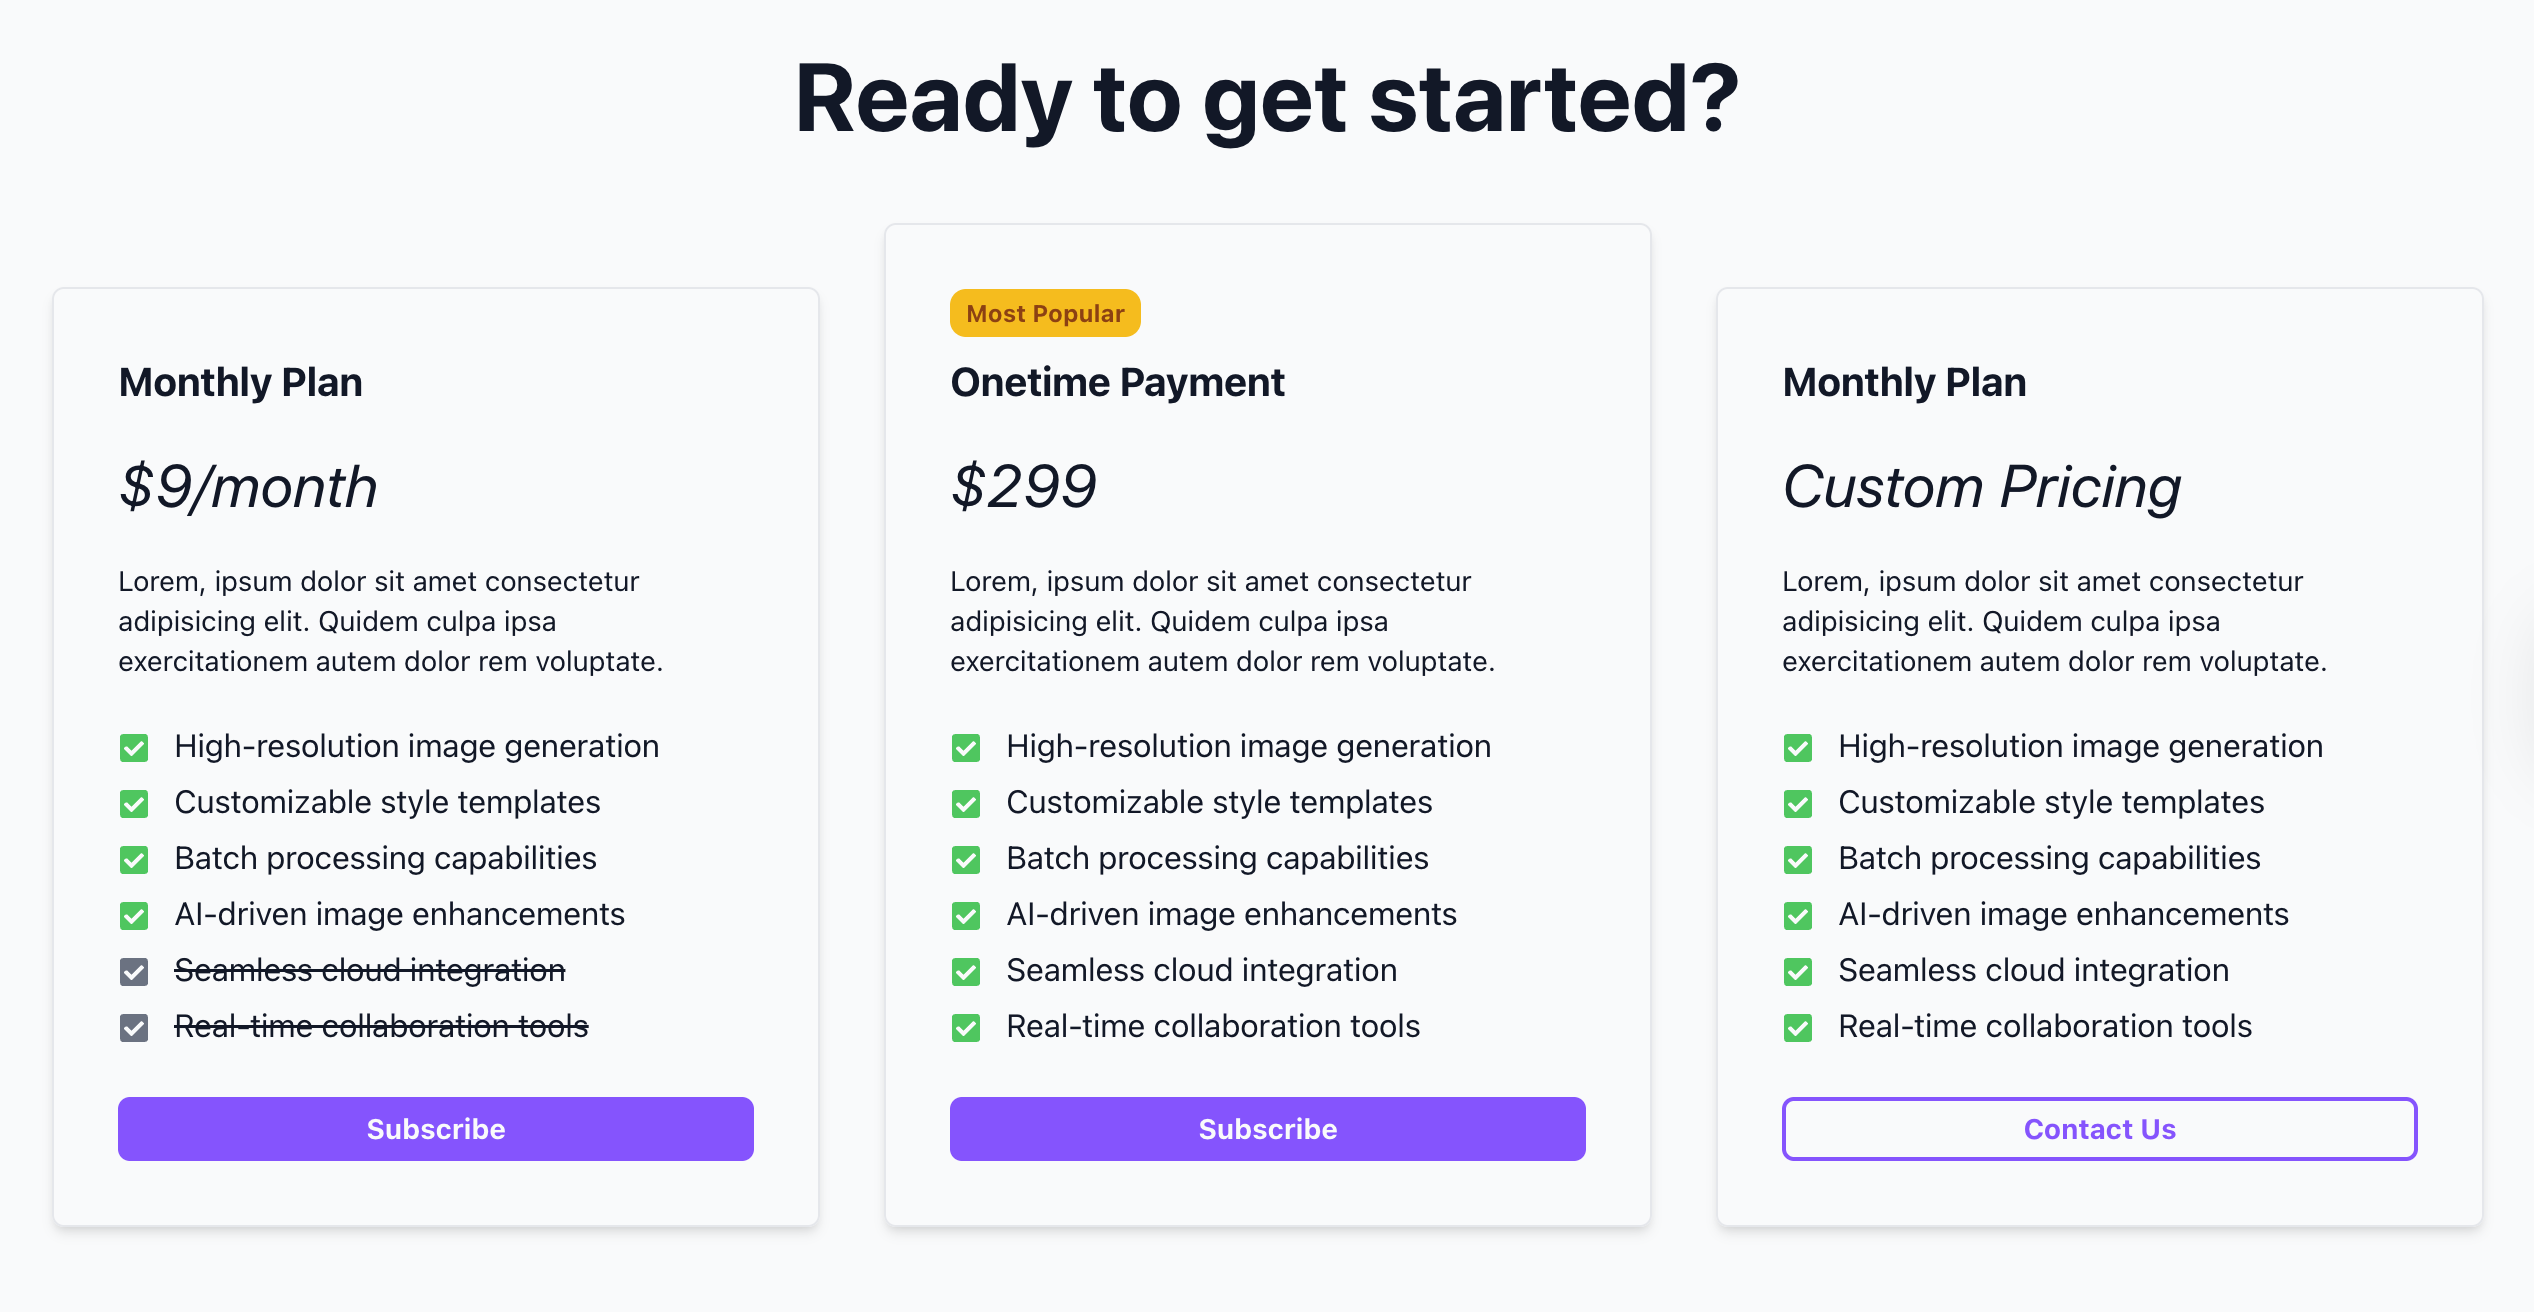
If you need more flexibility, you can also use the StripeButton component to create your own pricing section.
Get the Stripe secret key
To set up payment, first make sure you have a Stripe account.
During development, you should work inside a sandbox. The ensures whatever happens during development and testing will not mess up your production payment workflow.
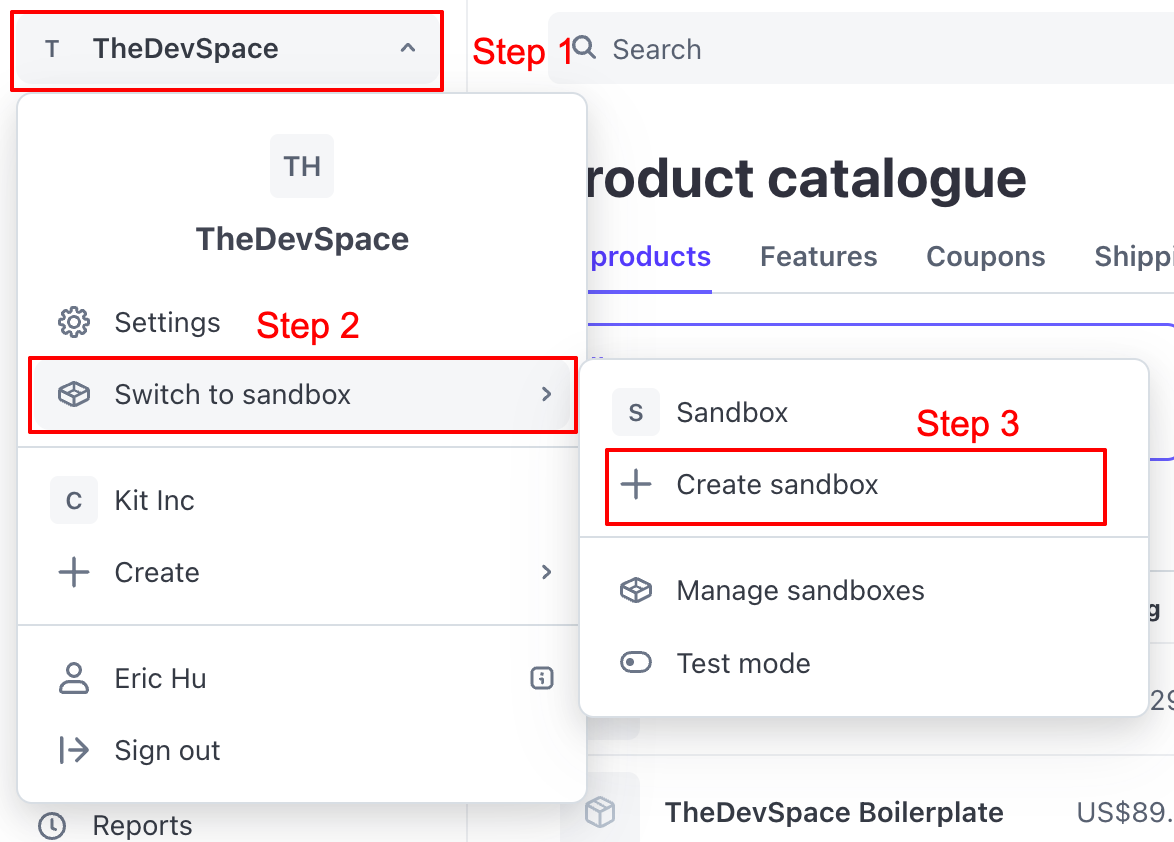
Inside the sandbox, go to Developers -> API keys:
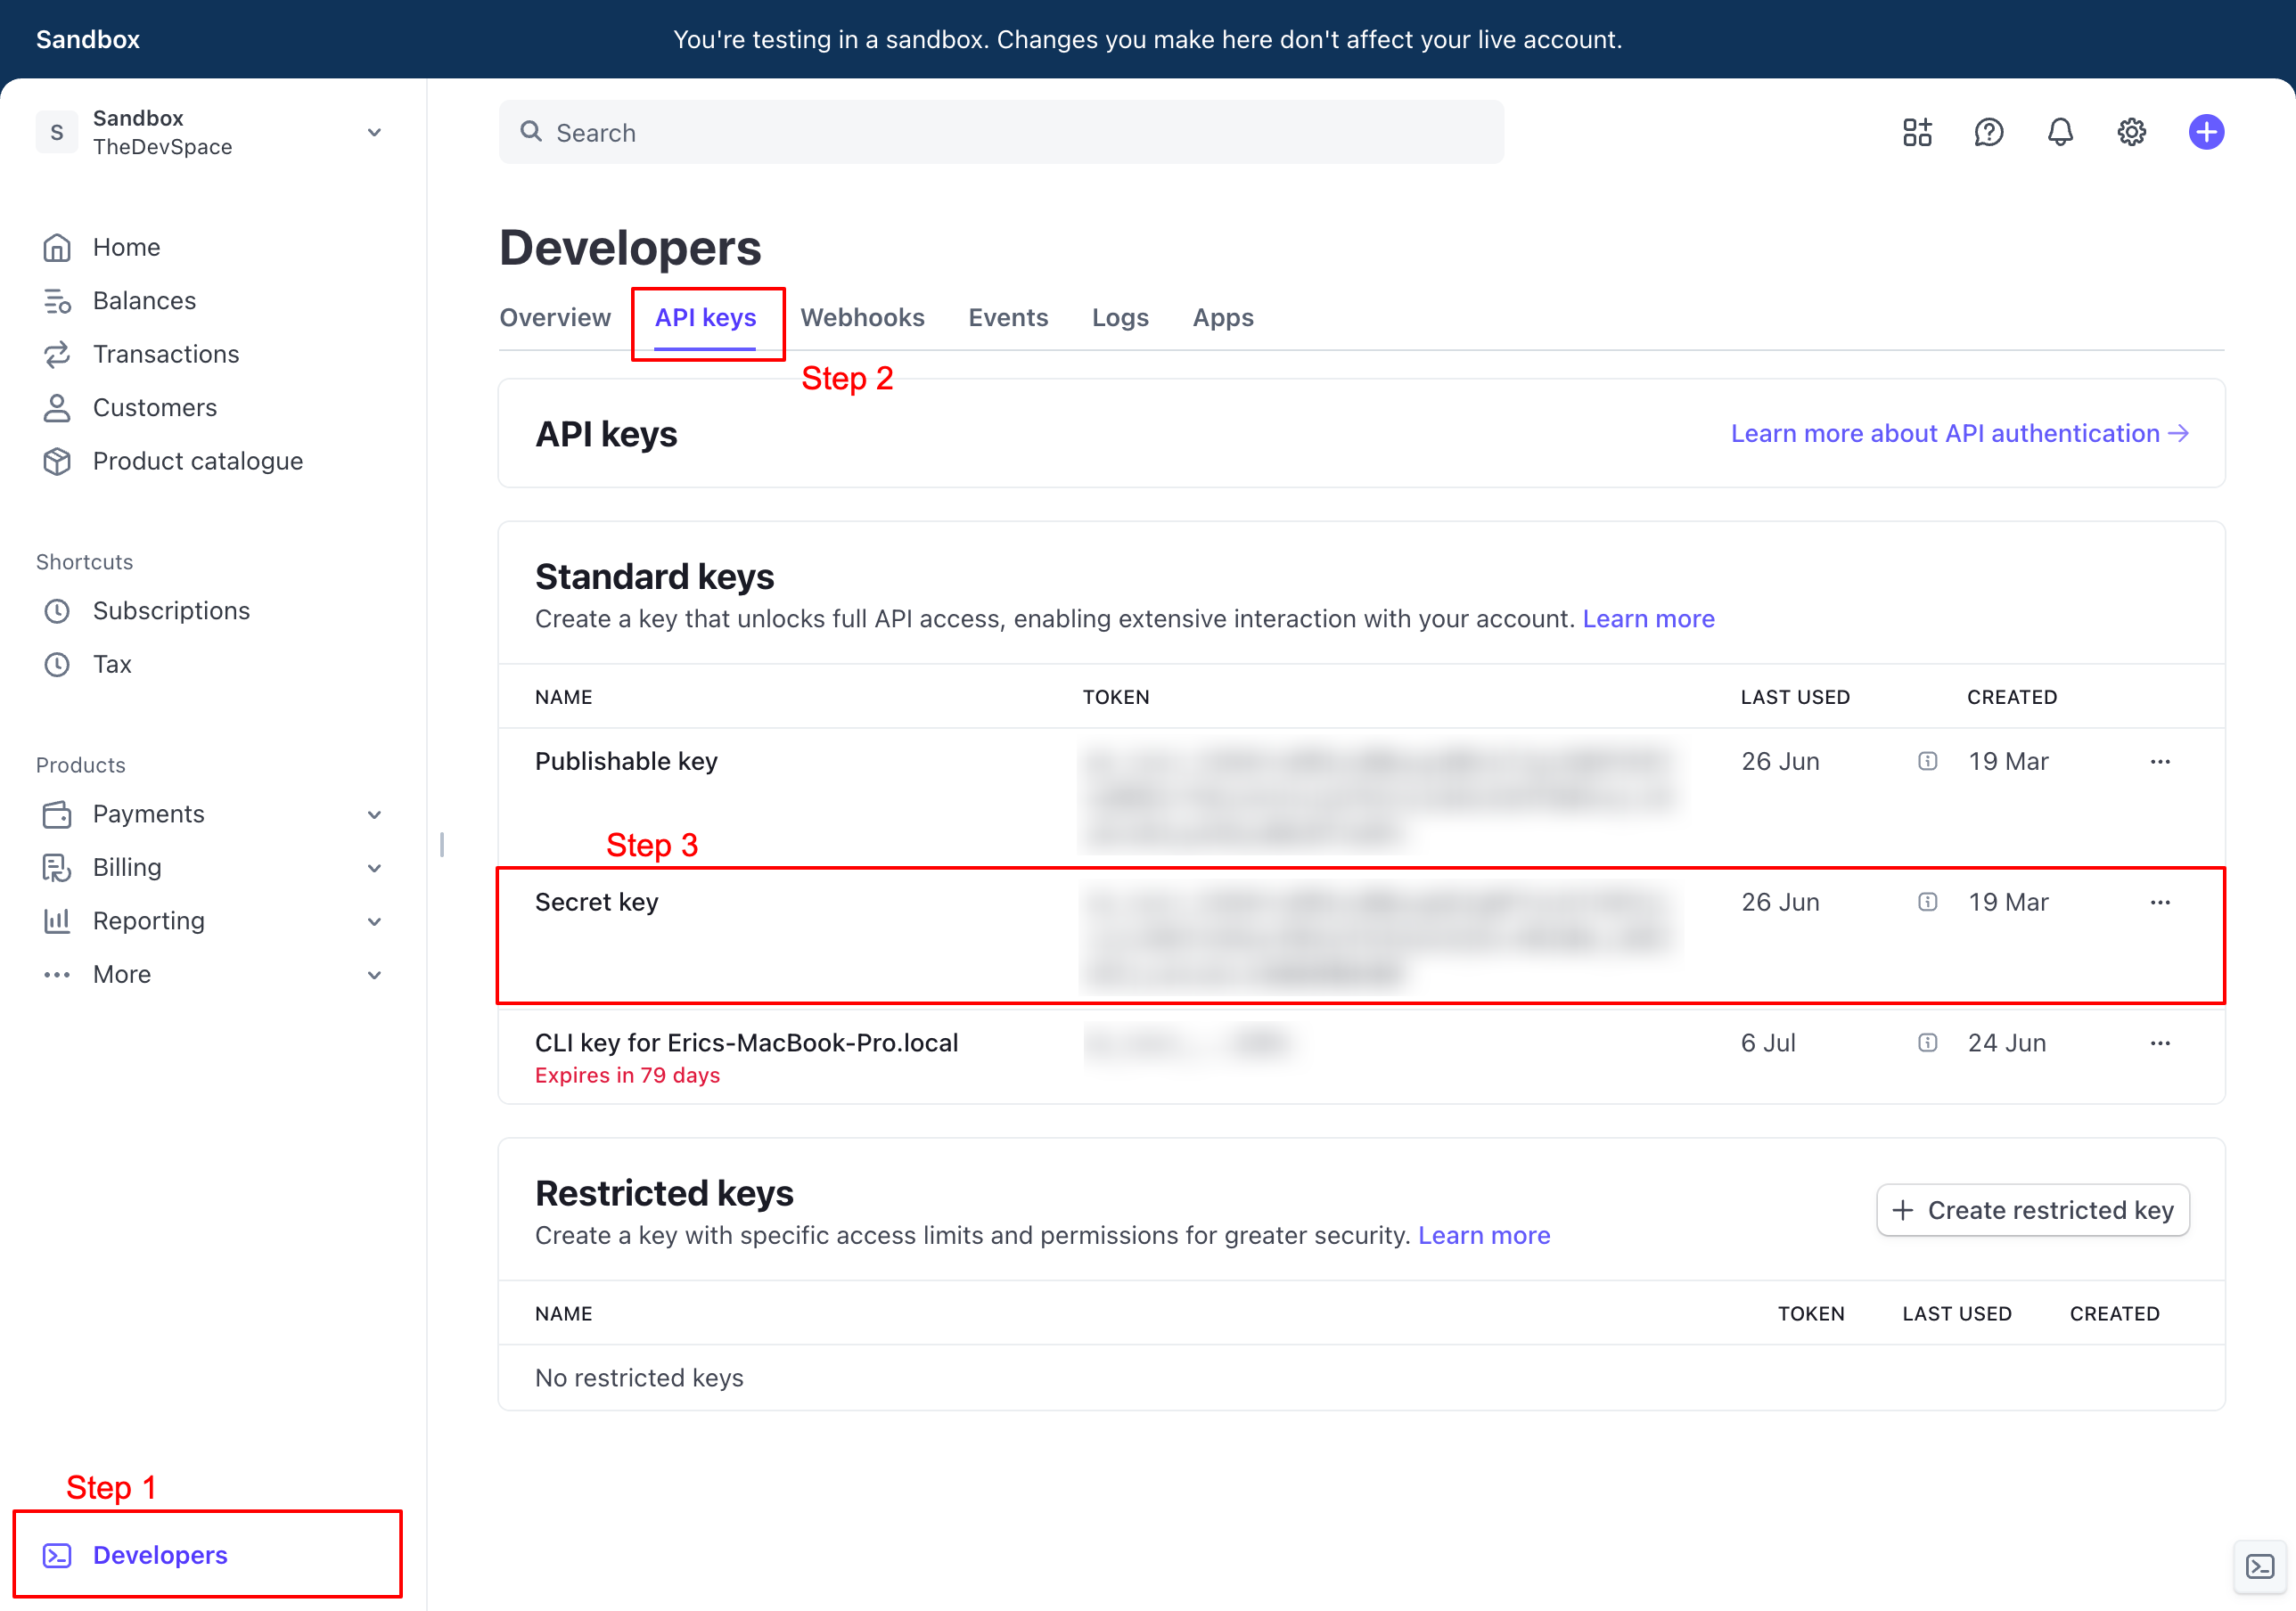
Copy and past the Secret key into your .env as STRIPE_SECRET_KEY.
STRIPE_SECRET_KEY="sk_test_51R4XXXXXXXXXX"Create a new product
Next, go to Product catalog and create a new product.
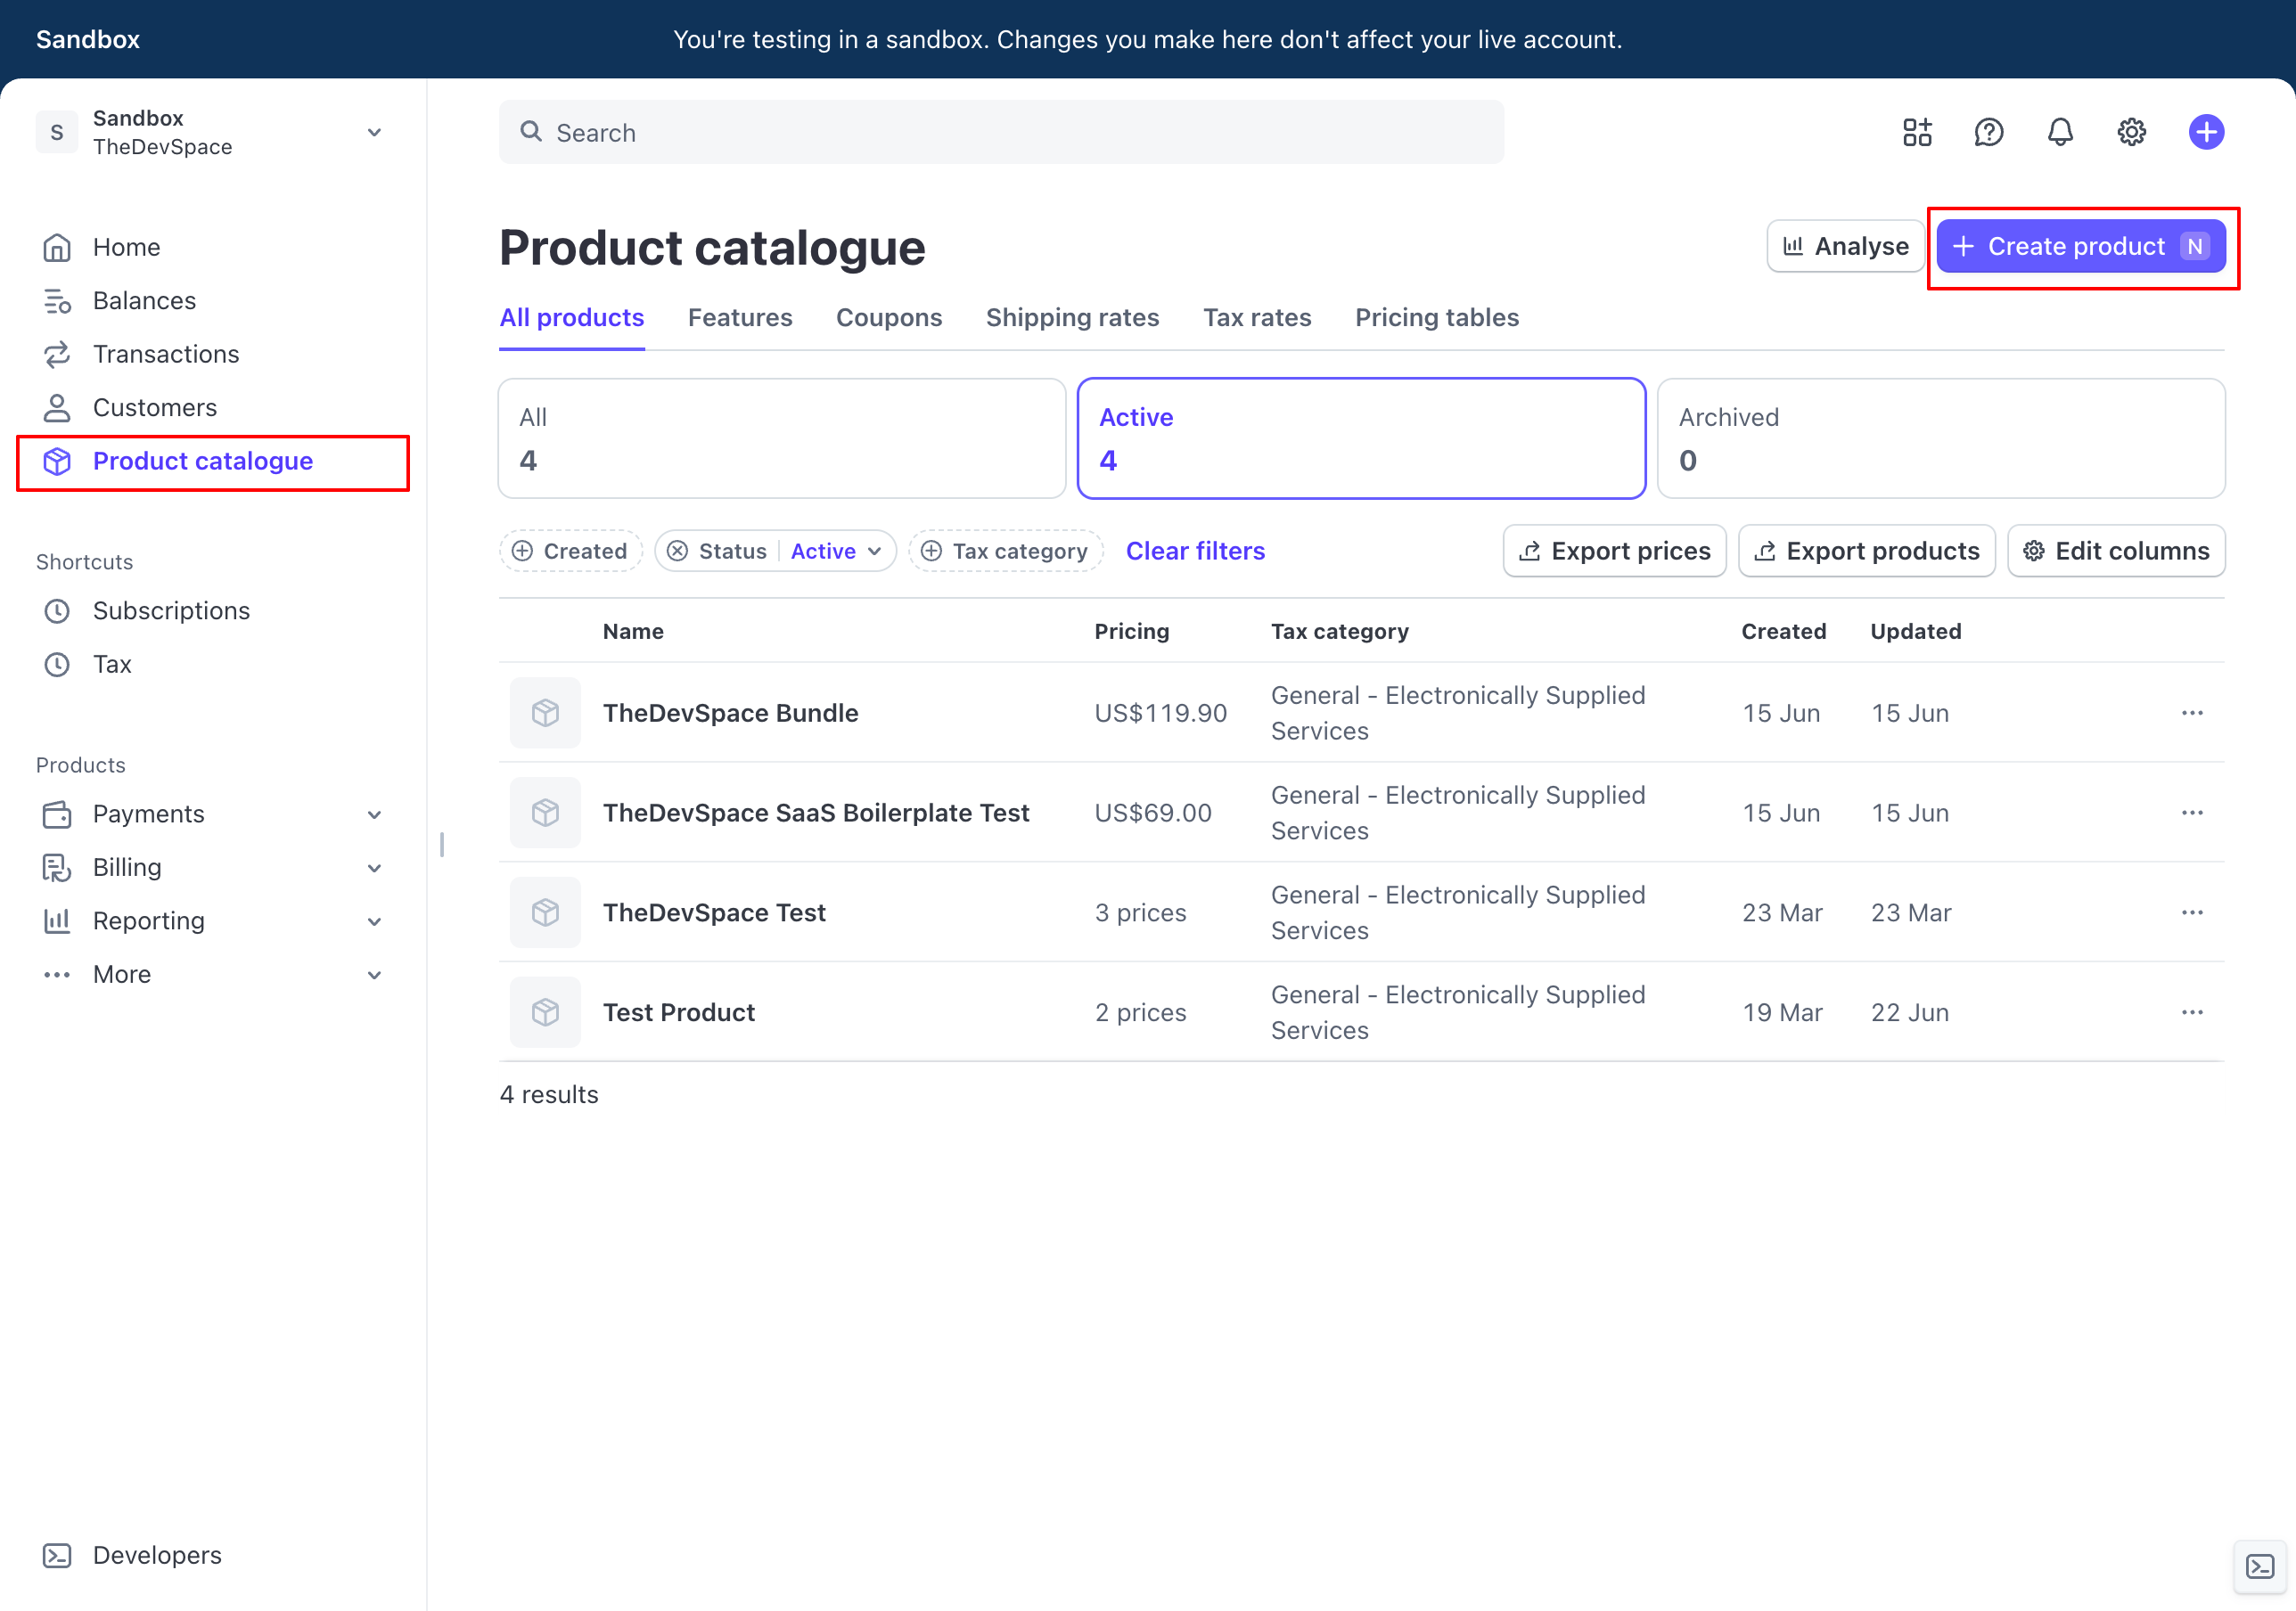
When setting up the prices, you can have monthly subscription or onetime payment.
Set the prices and save the product, and you should see the following page
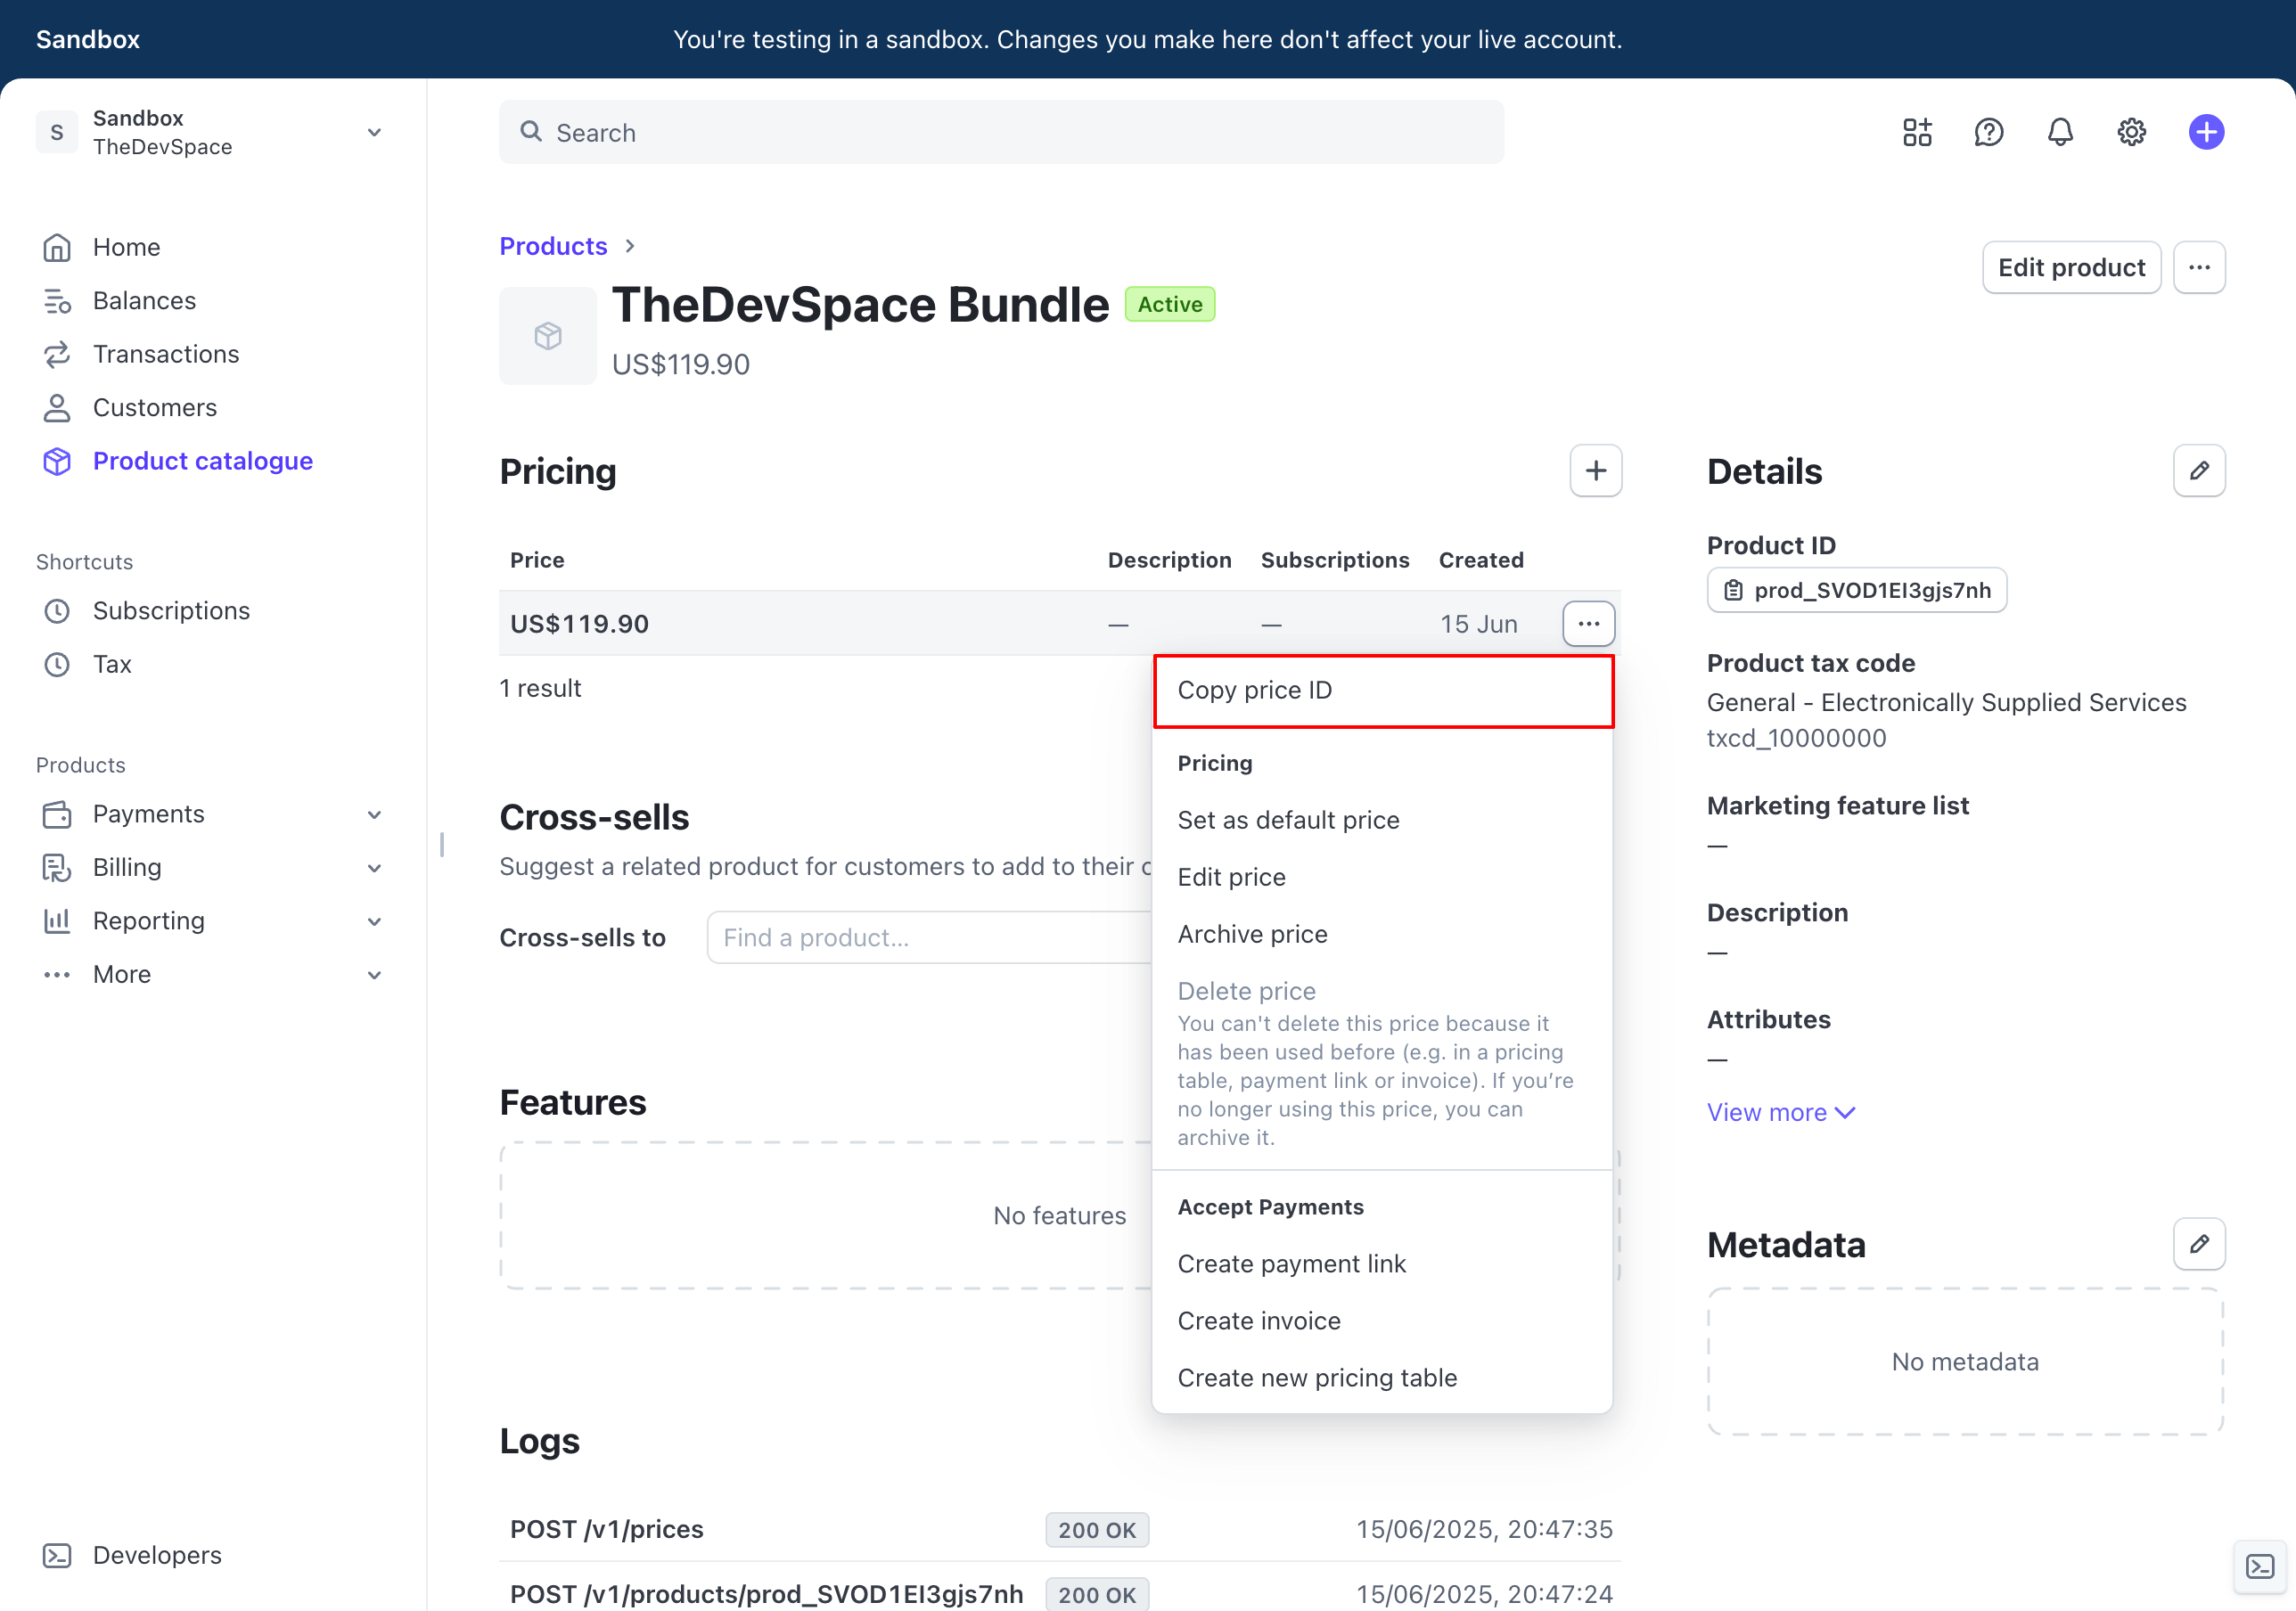
Click on the ... next to the price to copy the price IDs.
Save the monthly subscription price ID into your .env as STRIPE_PRICE_KEY_MONTH.
Save the yearly subscription price ID as STRIPE_PRICE_KEY_MONTH.
Save the onetime payment price ID as STRIPE_PRICE_KEY_ONETIME.
PRICE_KEY_MONTHLY="price_xxxxx"
PRICE_KEY_YEARLY="price_xxxxx"
PRICE_KEY_ONETIME="price_xxxxx"
Setting up webhook
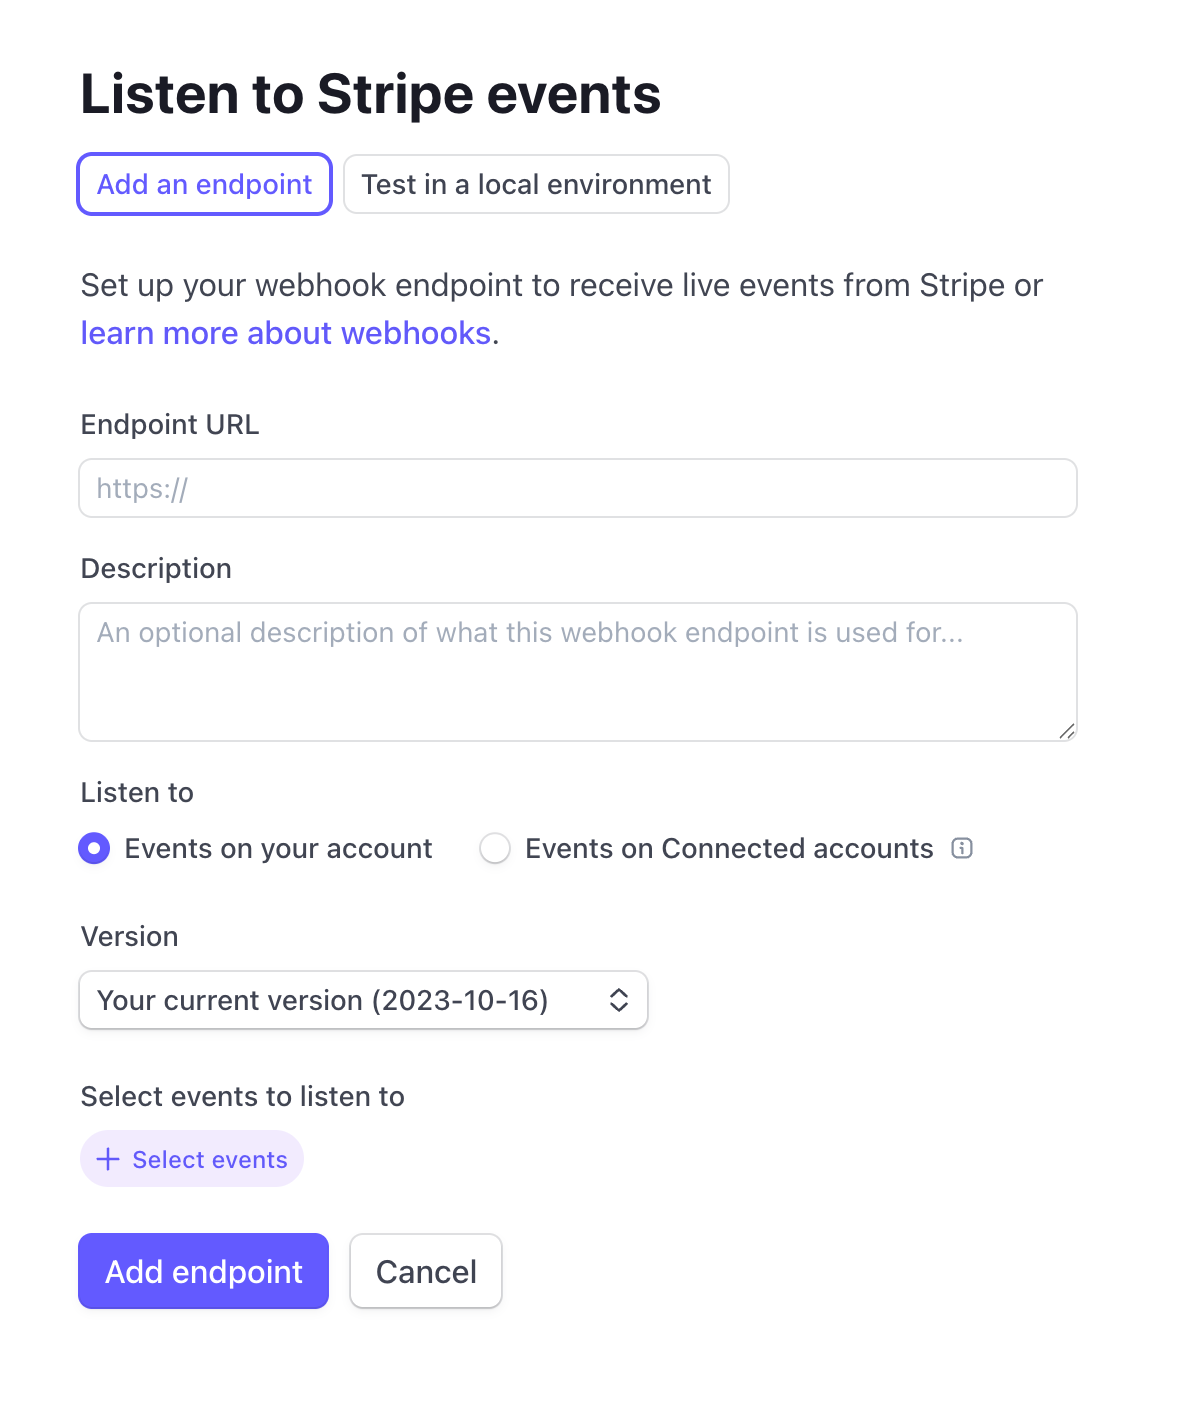
A webhook allows Stripe to talk back to your app, telling it things like a user has purchased your product, and their status should be changed to active.
Go to Developers -> Webhooks.
Since we're currently working under dev environment, you should add a local listener.
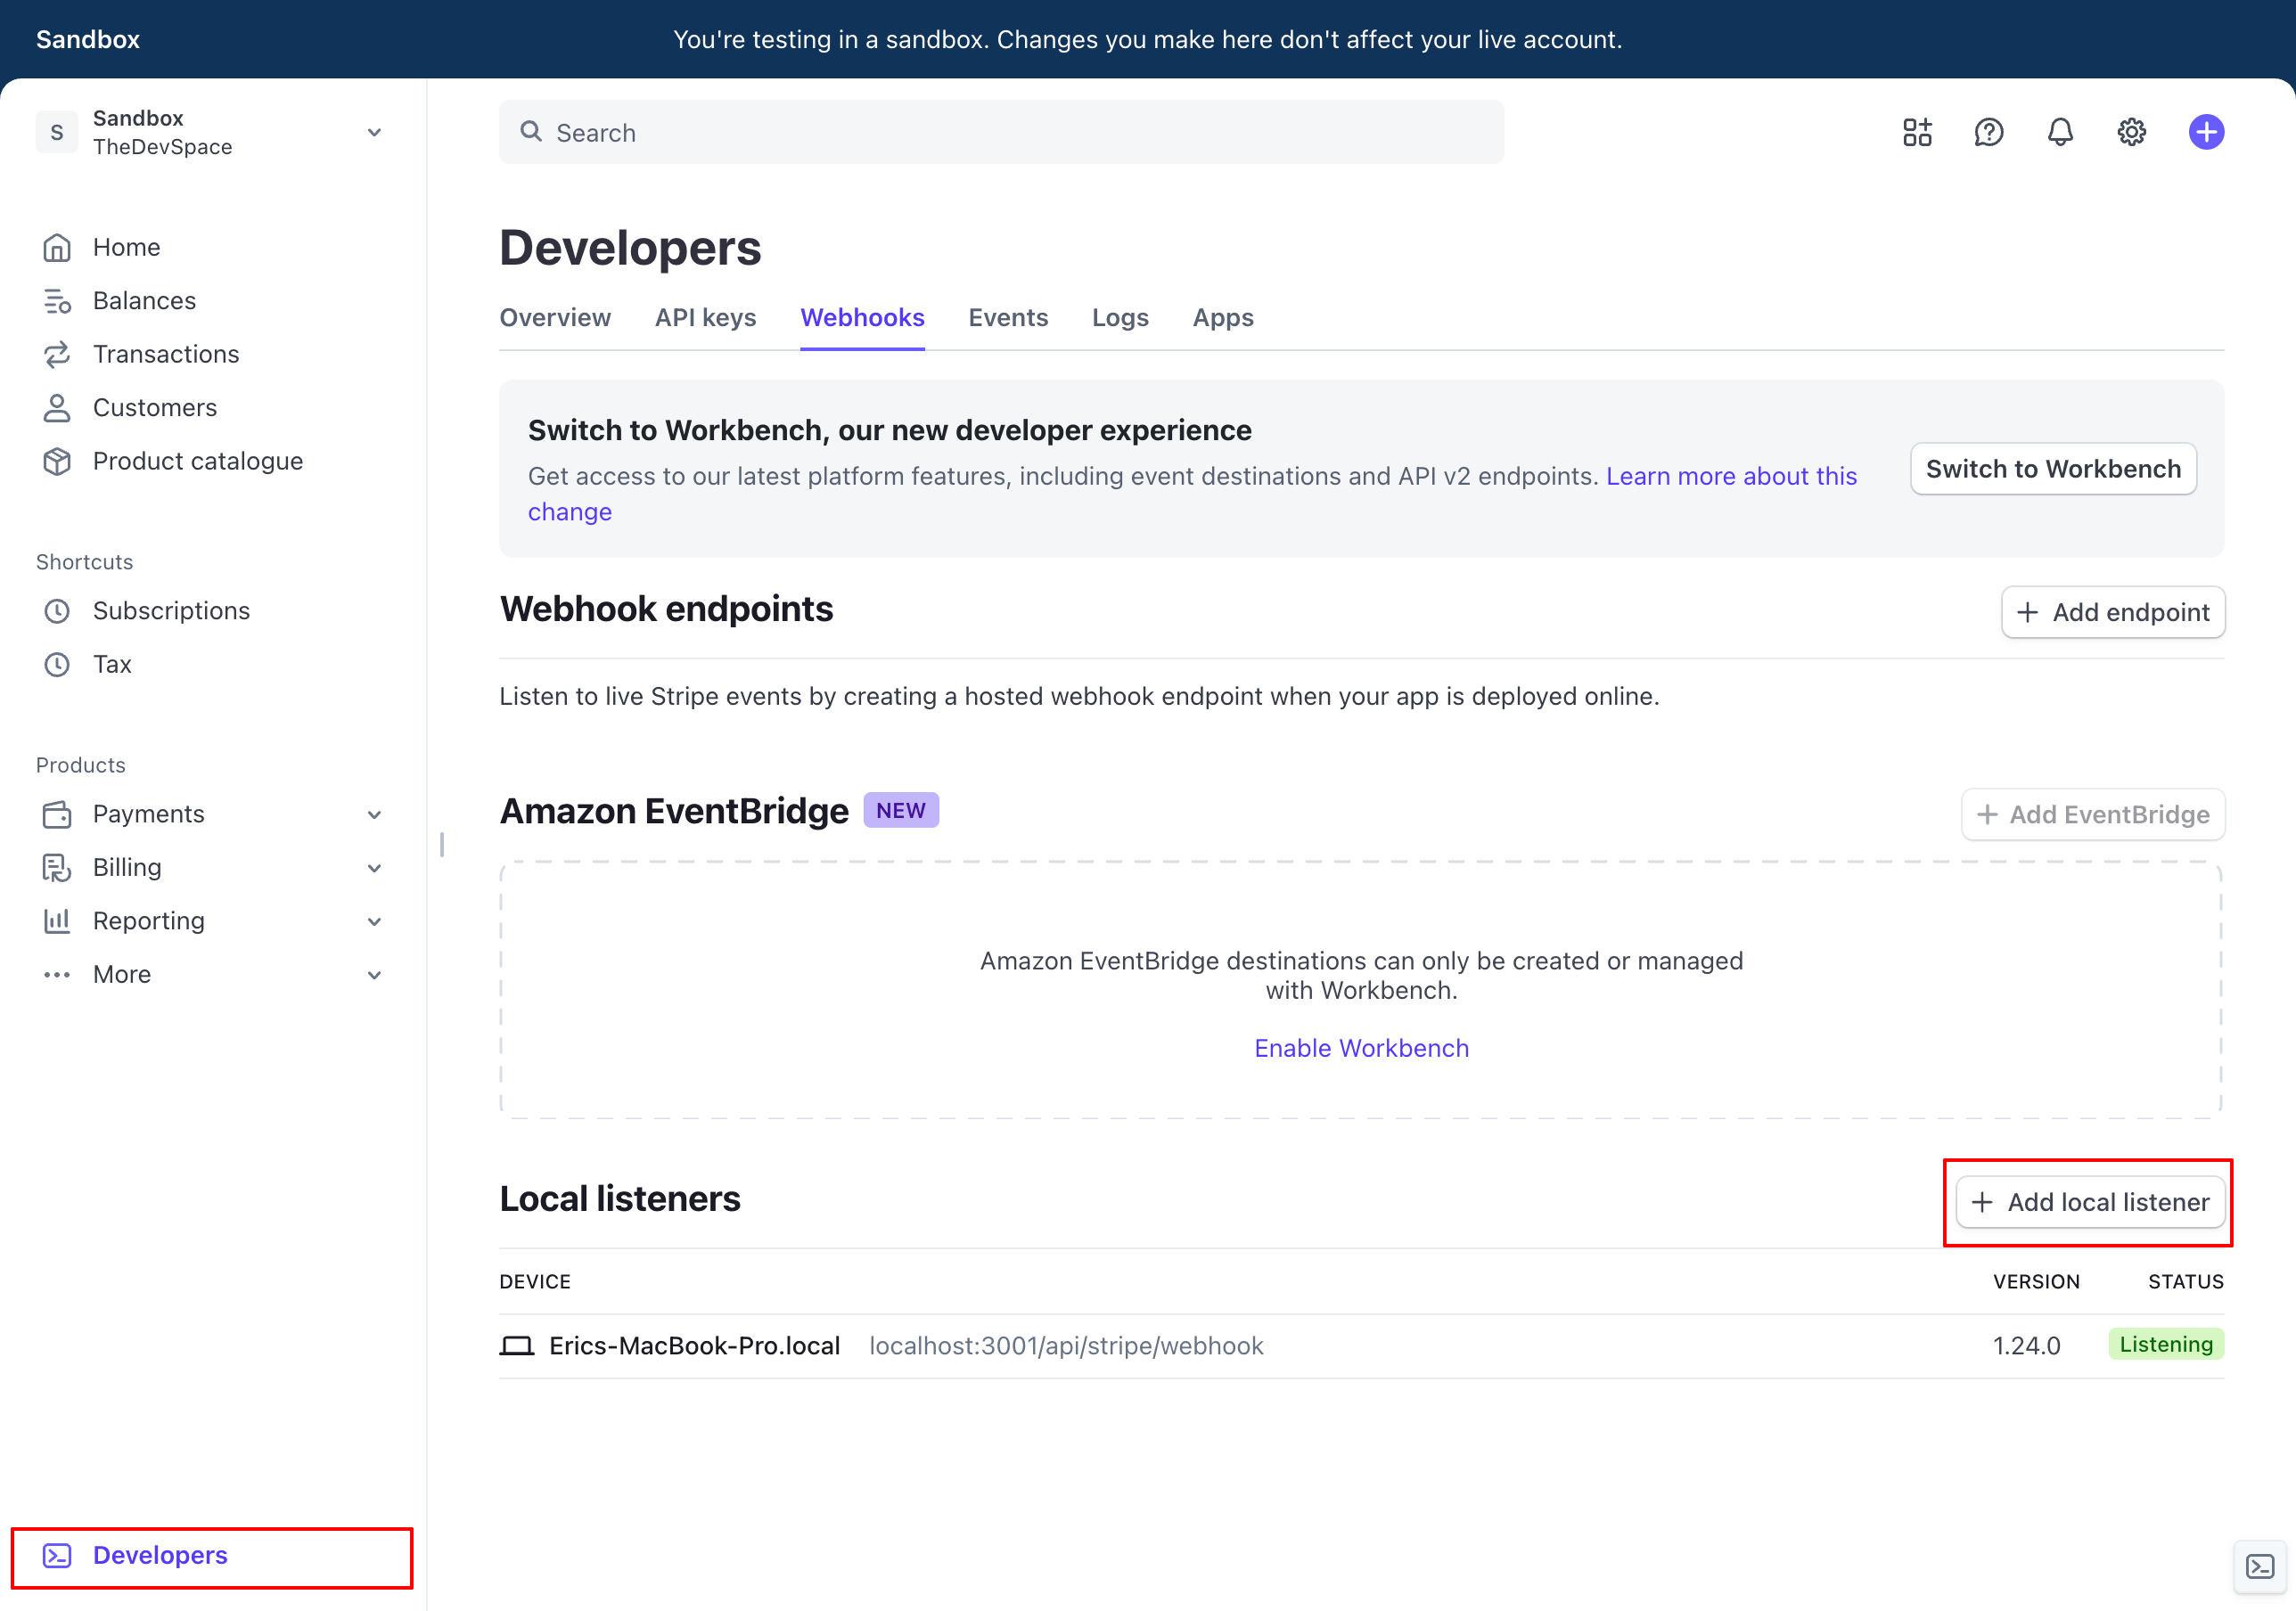
Follow the instructions you see on this page to set up everything on your machine:

When running the command in step 2, remember to replace the webhook URL to the one you're actually using on your machine. It should be something like: localhost:<port>/api/stripe/webhook
Going to production?
When you are ready to move your SaaS app into production, exit the sandbox and repeat the same steps we discussed above.
In the webhook step, instead of adding a local listener, make sure you add the actual API endpoint where your SaaS is hosted, something like <your_domain>/api/stripe/webhook.